


The Ultimate Mississippi Mud Pie, A Cherished Southern Favorite
This fridge-chilled pie, perfect for warmer weather, sports not just a single layer of chocolate goodness but two : a fudgy base and a custard topping. Oh, and that’s not all my mountaineers!


🎵 Dive into delight with Mississippi Mud Pie, Rich chocolate layers that’ll make you sigh. From crunchy crust to creamy top, One bite and you won’t want to stop! 🎵
OK, I’m not much of a songwriter, so let’s bake!

Mississippi Mud Pie, a beloved Southern dessert, is said to have originated in the state of Mississippi, drawing its name from the dense, muddy banks of the Mississippi River. Its exact origins are somewhat murky, but it likely emerged in the mid-20th century, a period when scrumptious layered desserts became popular in American kitchens just like grandmother’s. The pie’s name reflects its rich, dark chocolate appearance, reminiscent of the river’s thick mud. However, we promise that our pie doesn’t taste like mud, but you be the judge!
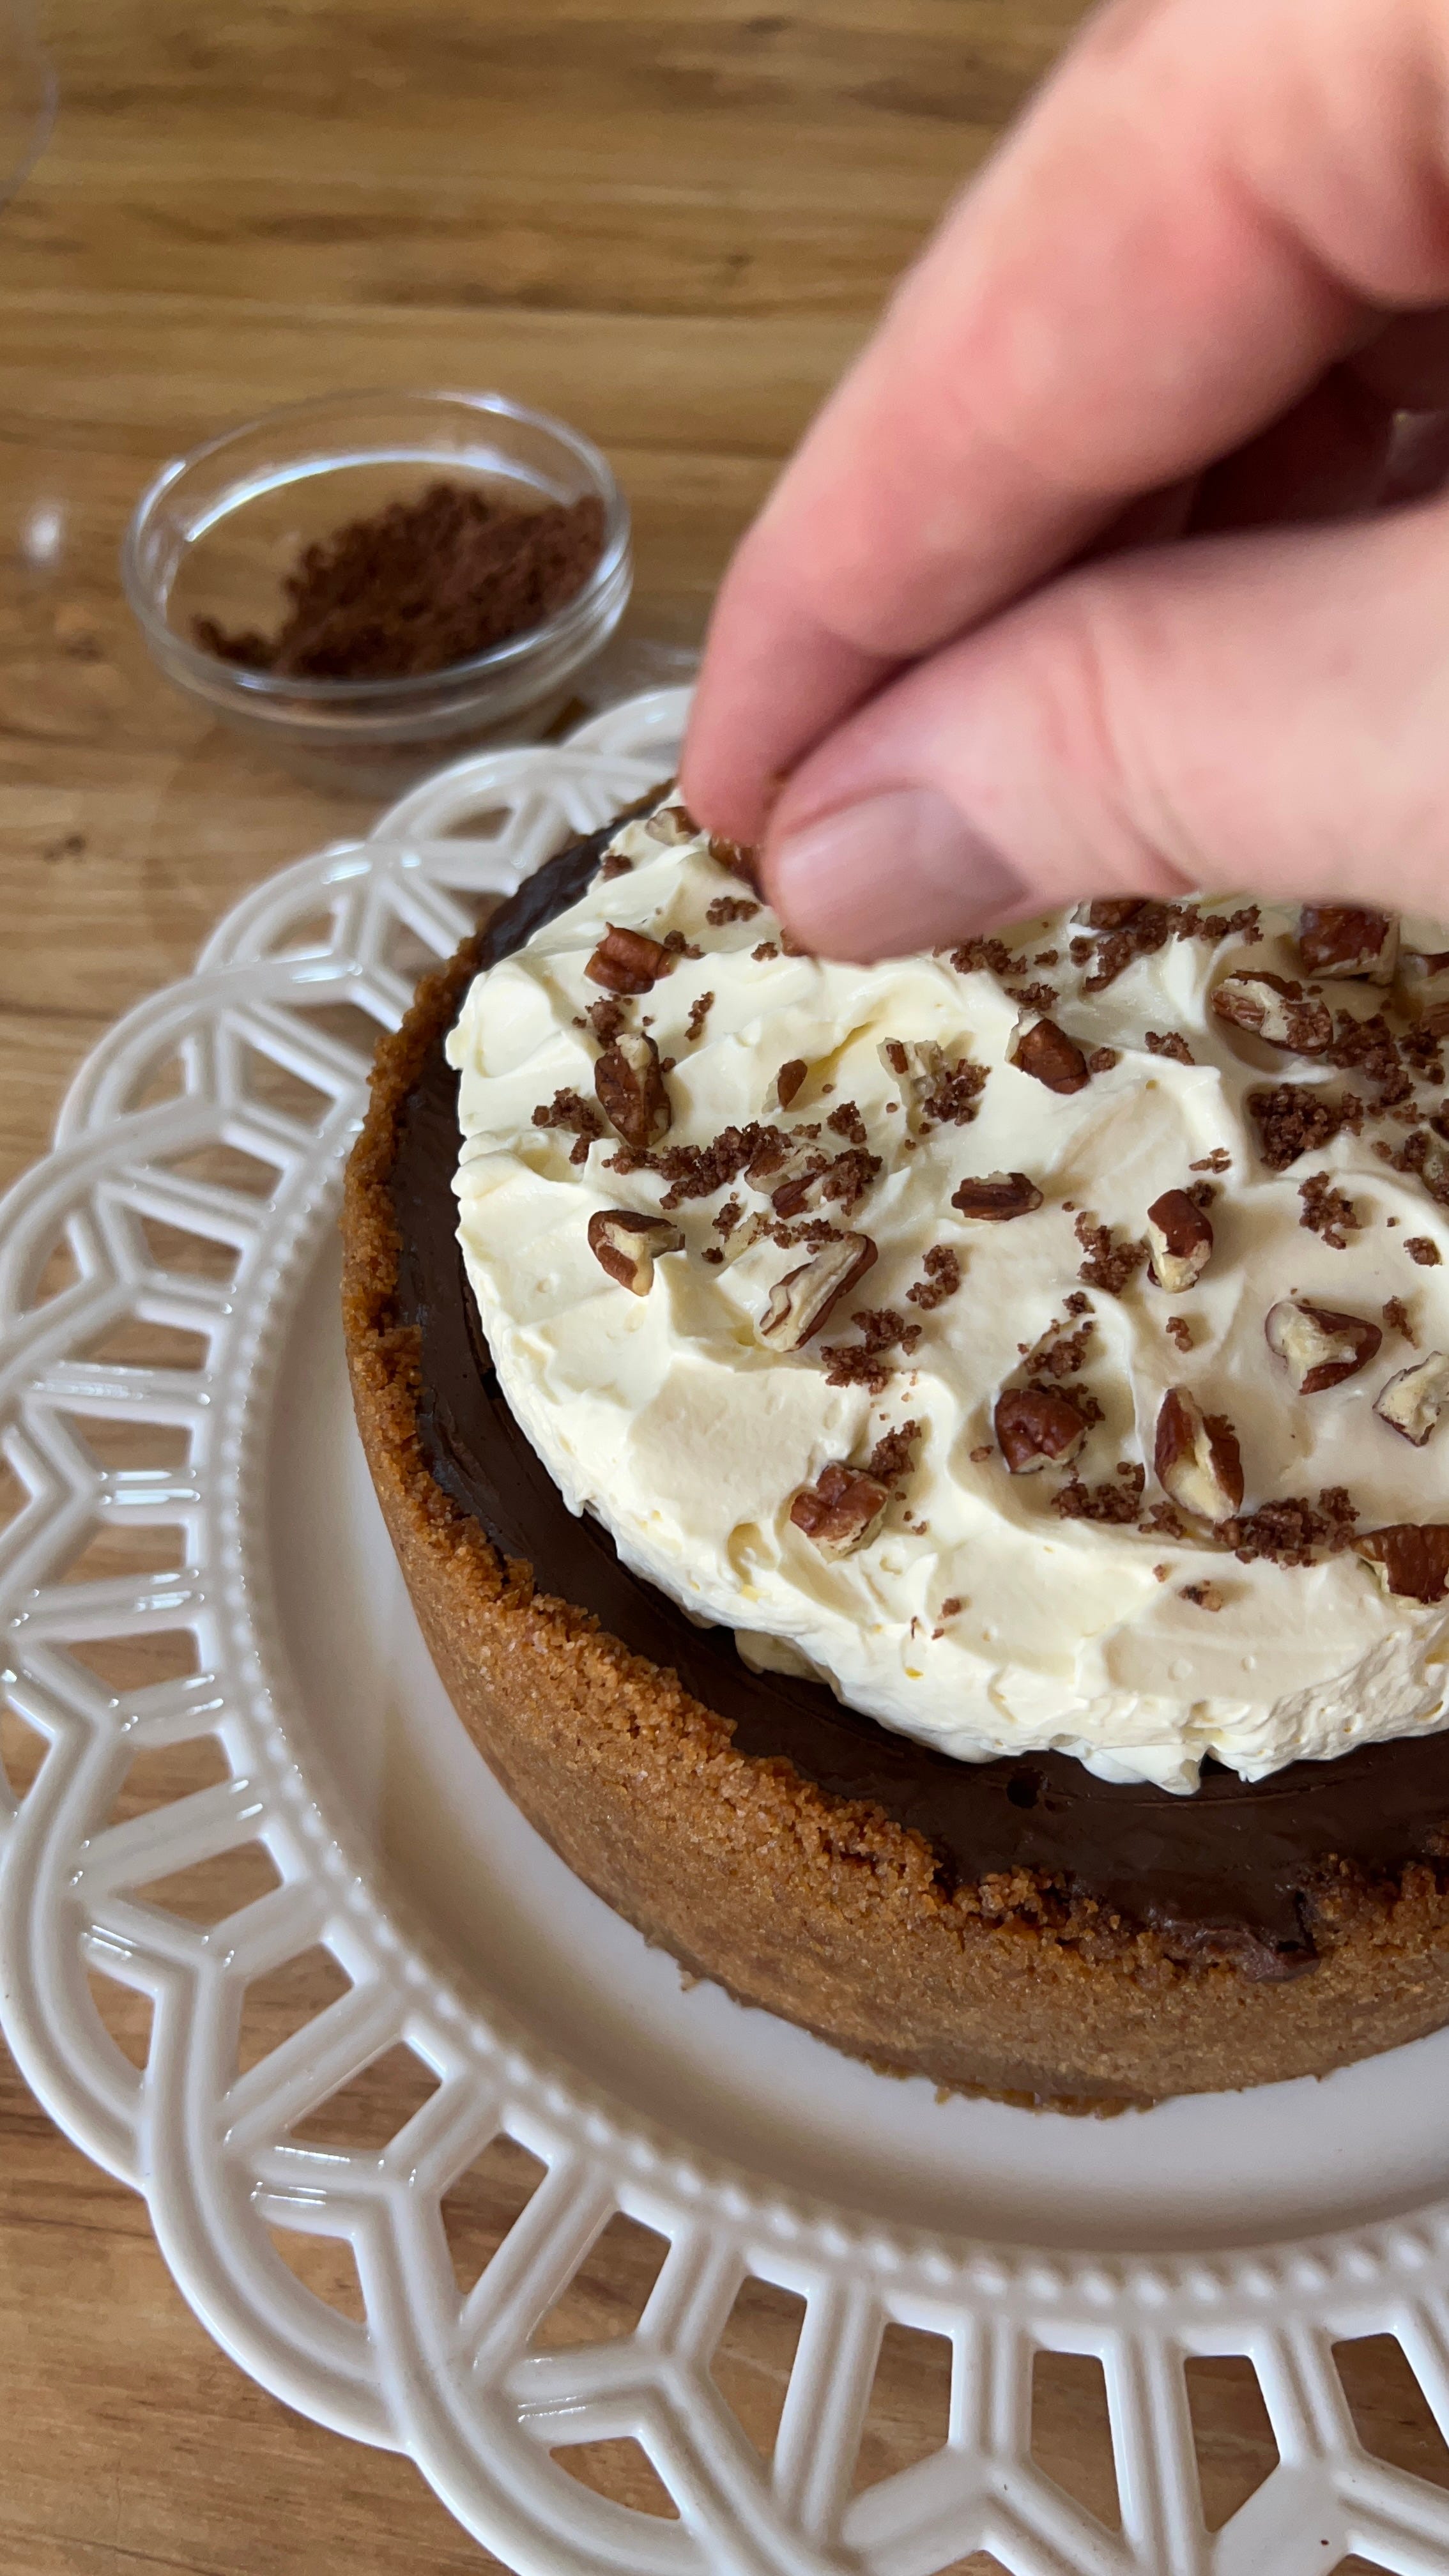
The classic Mississippi Mud Pie features a graham cracker crust (In my best friend’s house, it’s told that all snacks begin with a graham cracker base.), a layer of fudgy chocolate cake, and a smooth chocolate custard topping. Over the years, variations have included elements like marshmallows, pecans, or whipped cream, each adding their unique twist to the traditional recipe. Despite these variations, the core of the dessert remains a celebration of chocolate in multiple, delightful forms. In the Mountaintop Kitchen, we topped ours simply with chopped pecans and a homemade chocolate crumble.
Today, Mississippi Mud Pie continues to be a favorite among home bakers for its impressive presentation and irresistible flavor. It’s a versatile dessert that can be adapted to suit various tastes and preferences, making it a staple for gatherings and special occasions. The pie’s enduring popularity is a testament to its rich, satisfying layers and its roots in Southern baking traditions. Of course, you don’t have to live in the south of the USA to bake this delicious treat!


On Measuring Ingredients: My preferred method of measuring is weight by grams. Baking by volume rather than weight can lead to varied and unexpected results. Flour is especially problematic when measured by volume (sifted, not sifted, spooned, not spooned, fluffed or not … you get the point). Grams are always the same; they are your friend as a baker. King Arthur Baking Company’s Ingredients Weight Chart is helpful for converting recipe weights.
On Altitude Adjustments: Before measuring ingredients, preheating your oven, or setting your timer; it’s important to consider any necessary adjustments for baking at higher altitudes, which is generally considered to be 3,500ft and above. Most recipes are written for sea level up to 3,500ft. Take at look at our baking at High-Altitude Baking Adjustments page for guidance.
Crust:
2 ¼ cups graham cracker crumbs (225g)
¼ cup granulated sugar (50g)
¼ teaspoon salt
8 tablespoons unsalted butter, melted (113g)
Note: Reserve a tablespoon of this crust crumble for the topping.
Cake:
10 tablespoons unsalted butter (141g)
6 ounces bittersweet chocolate, chopped (170g)
1 cup dark brown sugar, packed (200g)
¼ cup unsweetened cocoa powder (25g)
1 teaspoon vanilla extract
¼ teaspoon salt
3 large egg yolks
3 large egg whites
¼ cup granulated sugar (50g)
⅓ cup all-purpose flour (40g)
Custard:
4 ounces bittersweet chocolate, chopped (113g)
2 tablespoons unsalted butter (28g)
⅔ cup granulated sugar (135g)
⅛ teaspoon salt
¼ cup unsweetened cocoa powder (25g)
2 tablespoons cornstarch (16g)
2 cups whole milk (480ml)
4 large egg yolks
Topping:
1 ½ cups cold heavy cream
1 tablespoon confectioners sugar
½ teaspoon vanilla extract
3 tablespoons finely chopped pecans
Reserved crust crumble + a tad of cocoa powder as desired
Chocolate curls (optional)
Chocolate sauce, for drizzling (optional)


To make the crust: Preheat the oven to 325°F (165°C) for a conventional oven or 300°F (150°C) for a convection oven.
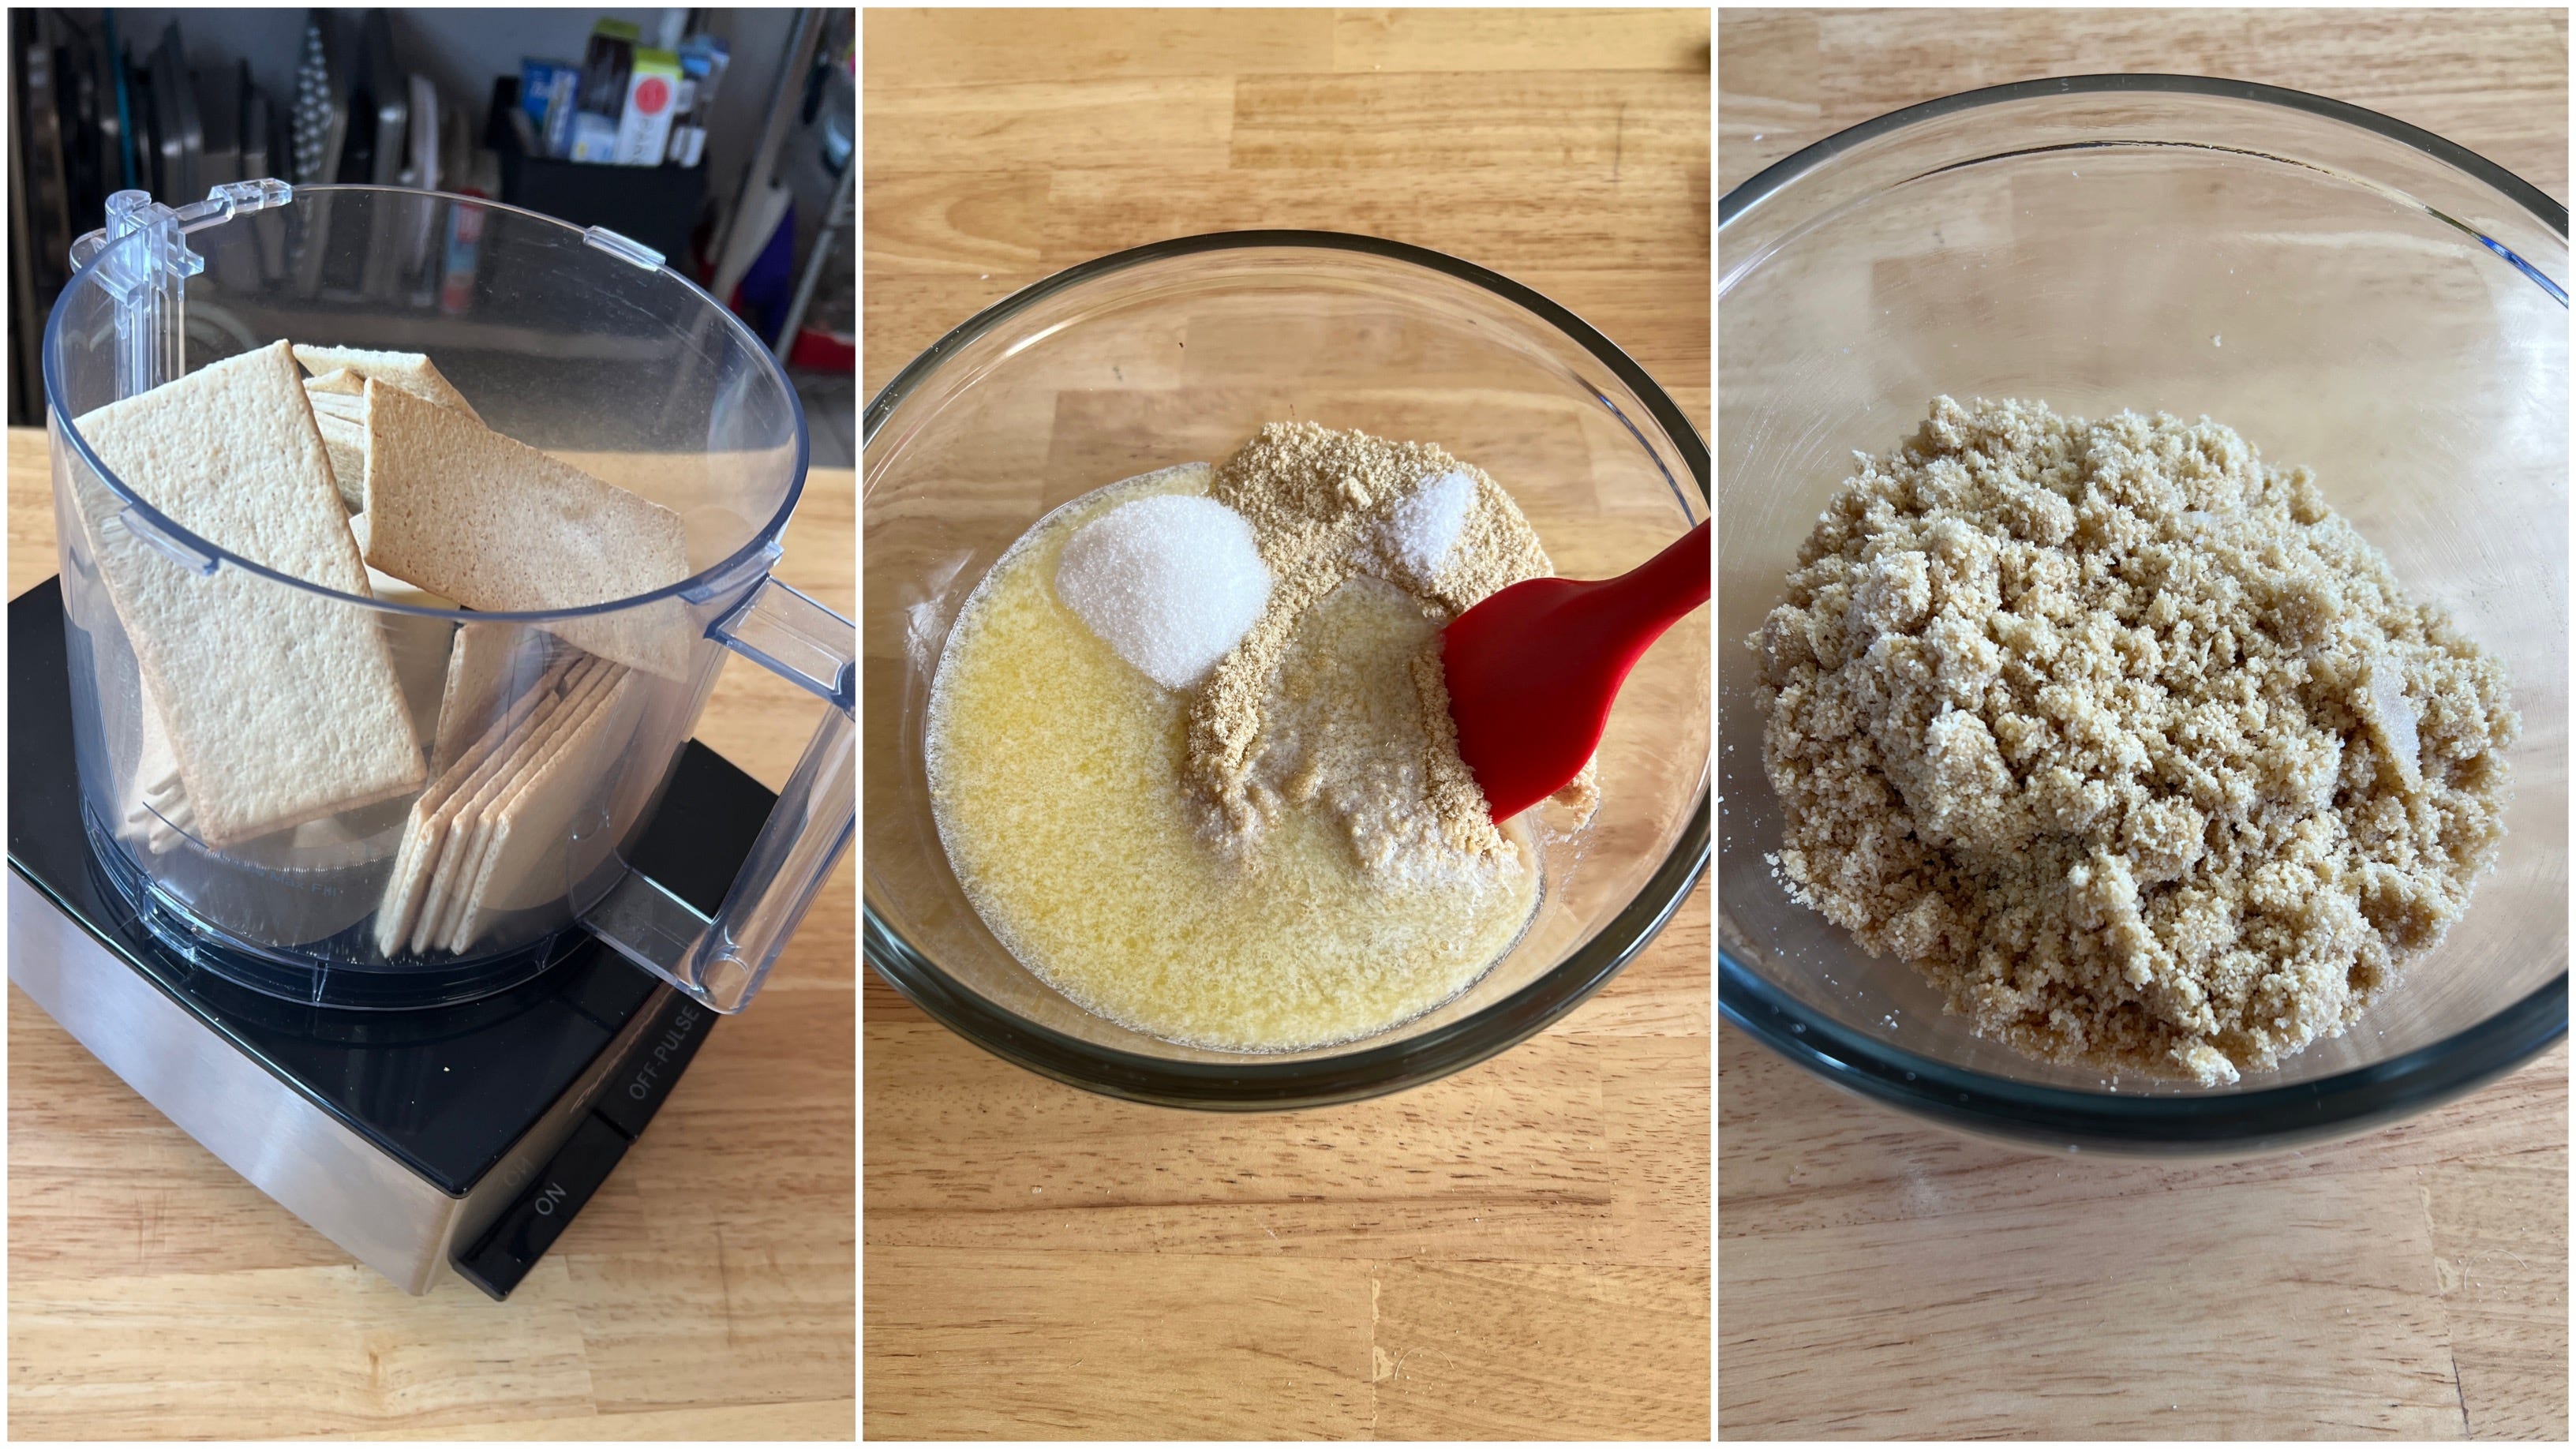
In a food processor, pulse graham crackers to fine crumbs, yielding approximately 2 1/4 cups.
Transfer crumbs to a bowl, add sugar, salt, and melted butter, mixing until evenly moistened.
Press the crumb mixture into the bottom and to the top of a 7-inch springform pan (This is the pan we used for this recipe.) or at least 2 1/4 inches up the sides of a 9-inch springform pan.
Bake the crust for about 10 minutes, until just set. Increase oven temperature to 350°F (175°C) for conventional or 325°F (160°C) for convection.
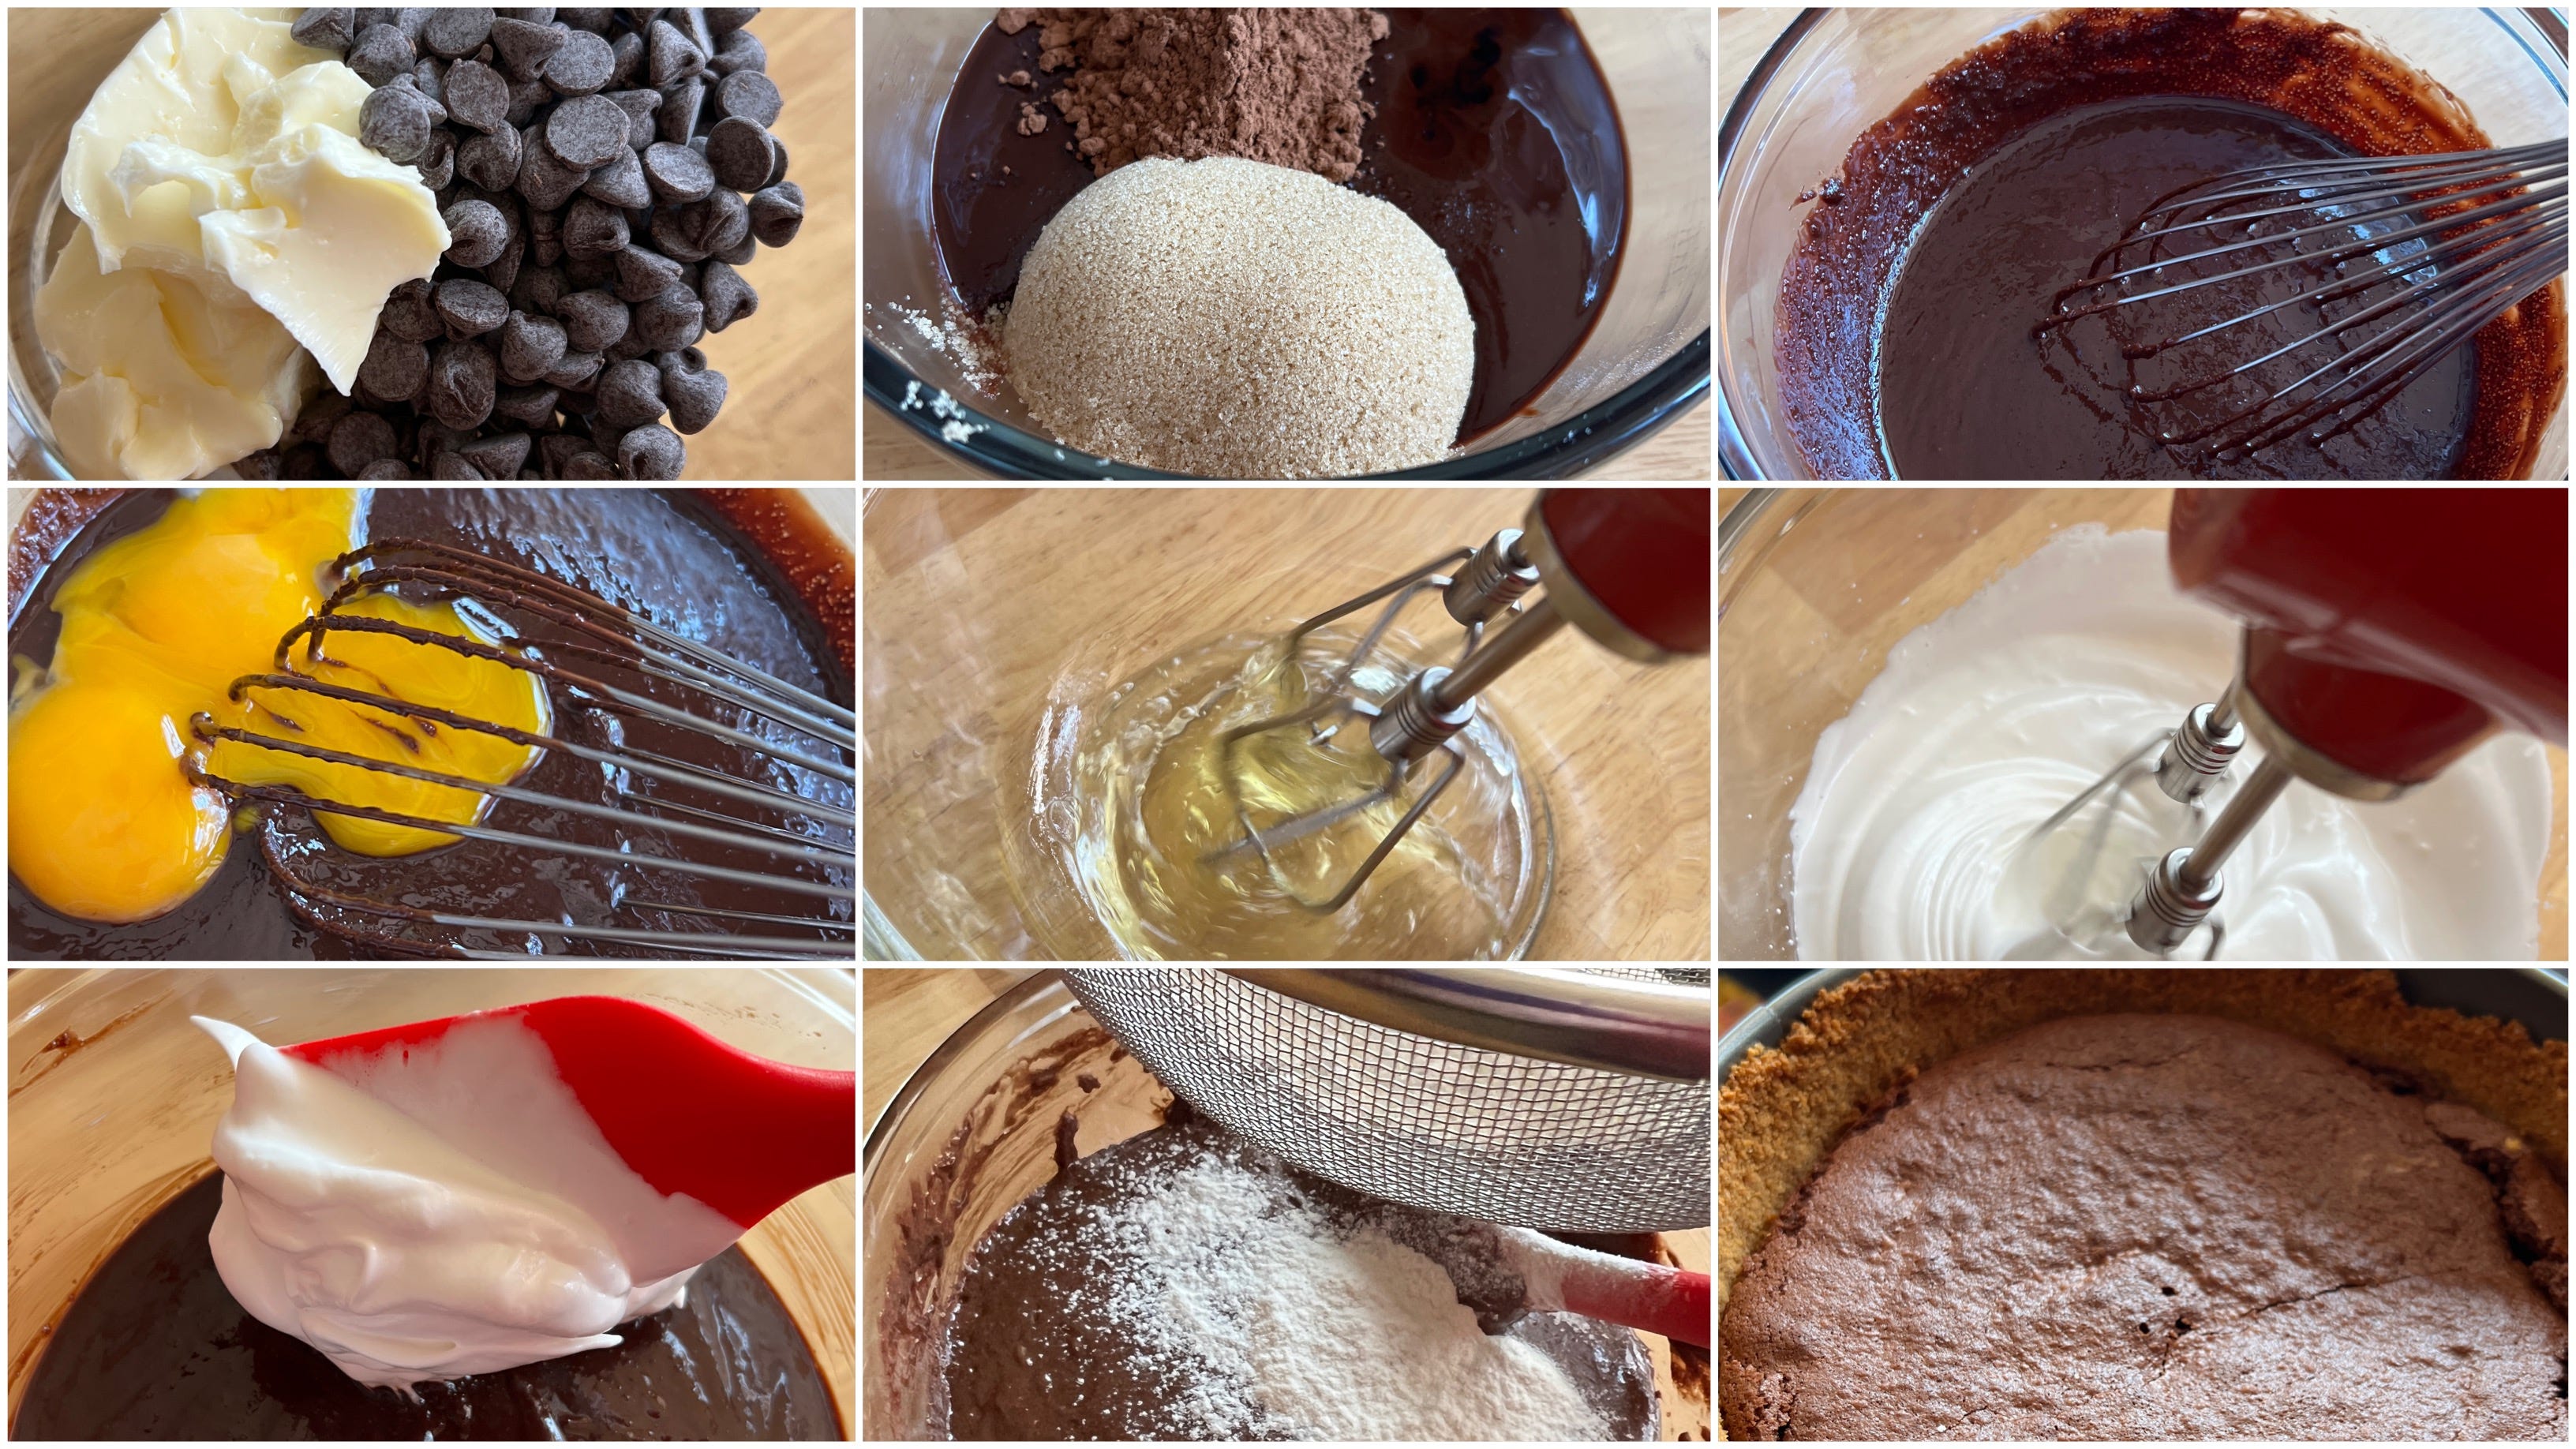
To make the cake: In a heatproof bowl set over barely simmering water (ensuring the bowl does not touch the water), melt the butter and chocolate together, stirring until smooth. Alternatively, melt in short bursts in the microwave, being cautious not to scorch the chocolate.
Remove from heat and whisk in the dark brown sugar, cocoa powder, vanilla extract, and salt. Allow to cool slightly before whisking in the egg yolks.
In a large bowl, beat the egg whites with an electric mixer on medium speed until foamy, about 30 seconds. Gradually add granulated sugar in a steady stream while continuing to beat on high speed until stiff peaks form, approximately 3 minutes.
Gently fold the egg white mixture into the chocolate mixture using a large rubber spatula. Sift the flour over the batter and fold in until fully incorporated.
Pour the batter into the prepared crust, smoothing the top. Bake for 30-35 minutes, until a crust forms on top, the center is just set, and a toothpick inserted 1 inch from the edges comes out with moist crumbs. The center should remain very moist and fudgy under the crust. Avoid overbaking.
Allow the cake to cool completely in the pan for at least 90 minutes. The cake will sink slightly as it cools.
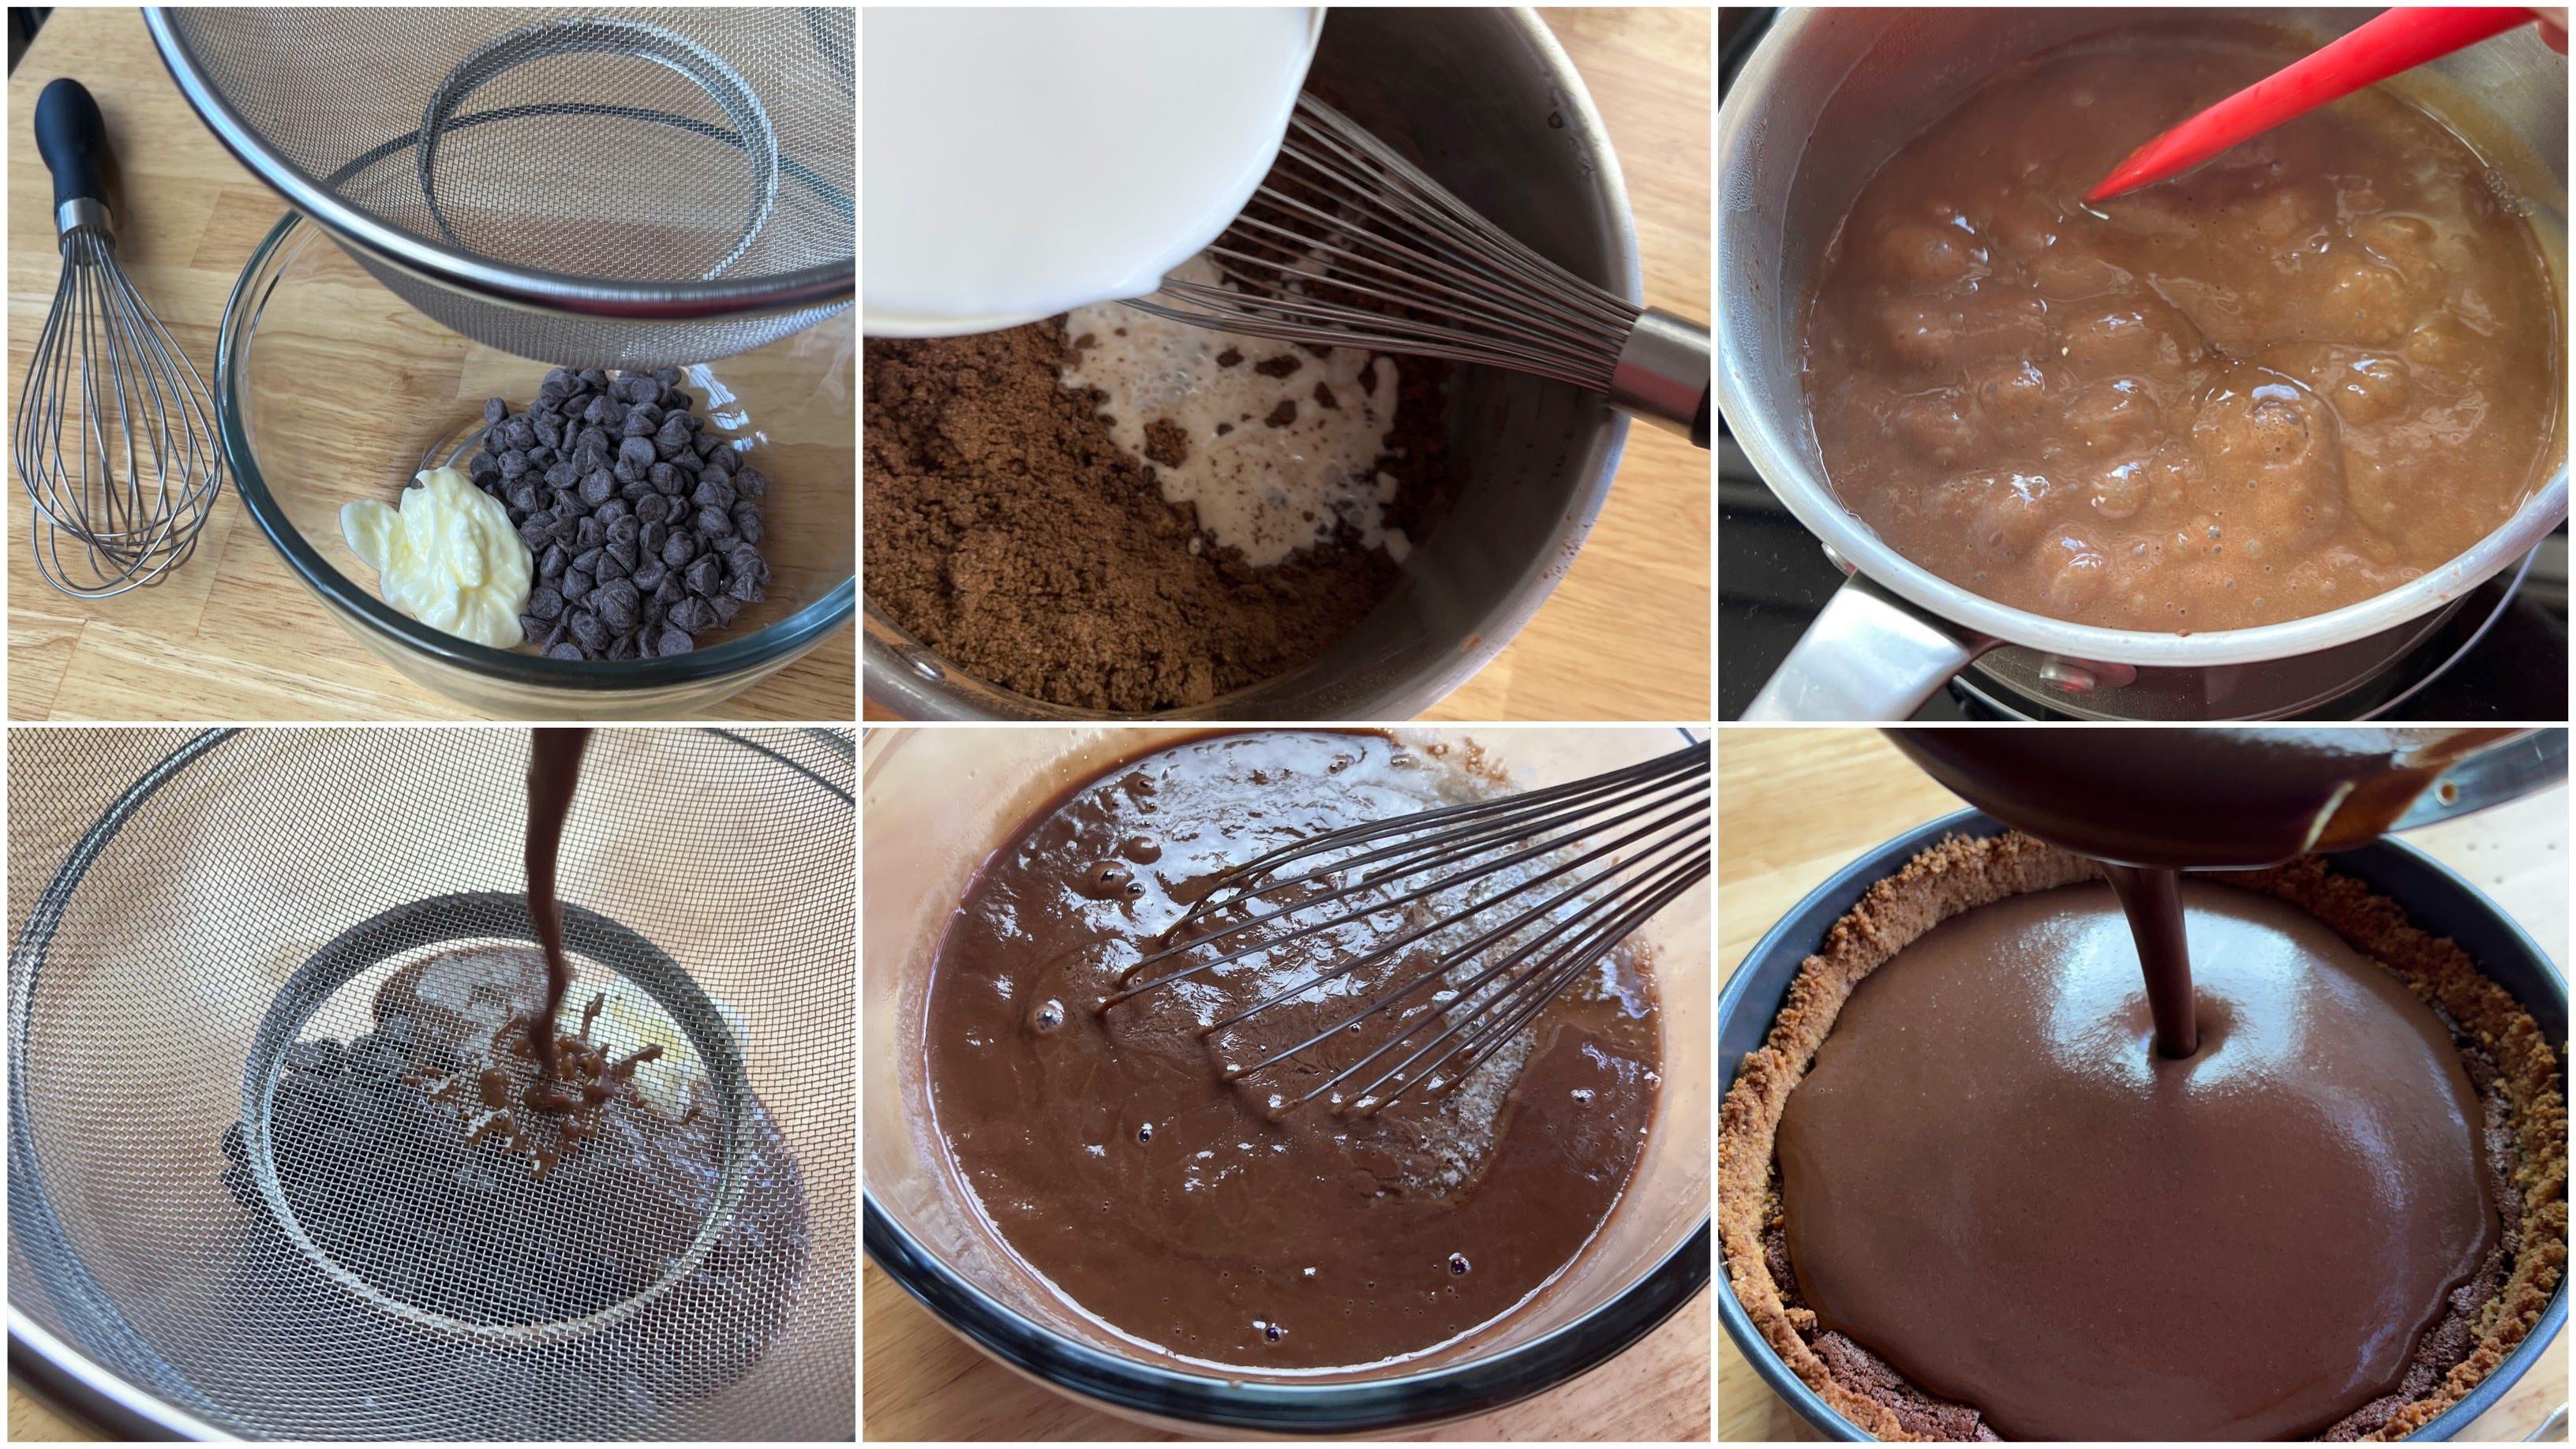
To make the custard: Place the chocolate and butter in a medium bowl. Set a fine-mesh sieve over the bowl and set aside.
In a medium saucepan, whisk together the sugar, salt, cocoa powder, and cornstarch. Gradually add the milk while whisking to ensure smooth incorporation. Whisk in the egg yolks.
Heat the mixture over medium heat, stirring constantly until it thickens and reaches a low boil. Cook for an additional minute, then pour through the sieve into the bowl with chocolate and butter, using a spatula to press it through.
Let the custard sit for 1 minute, then whisk until smooth. Pour the custard over the cooled cake. Cover the custard directly with plastic wrap or wax paper to prevent a skin from forming. Chill until fully set, at least 4 hours or up to overnight.
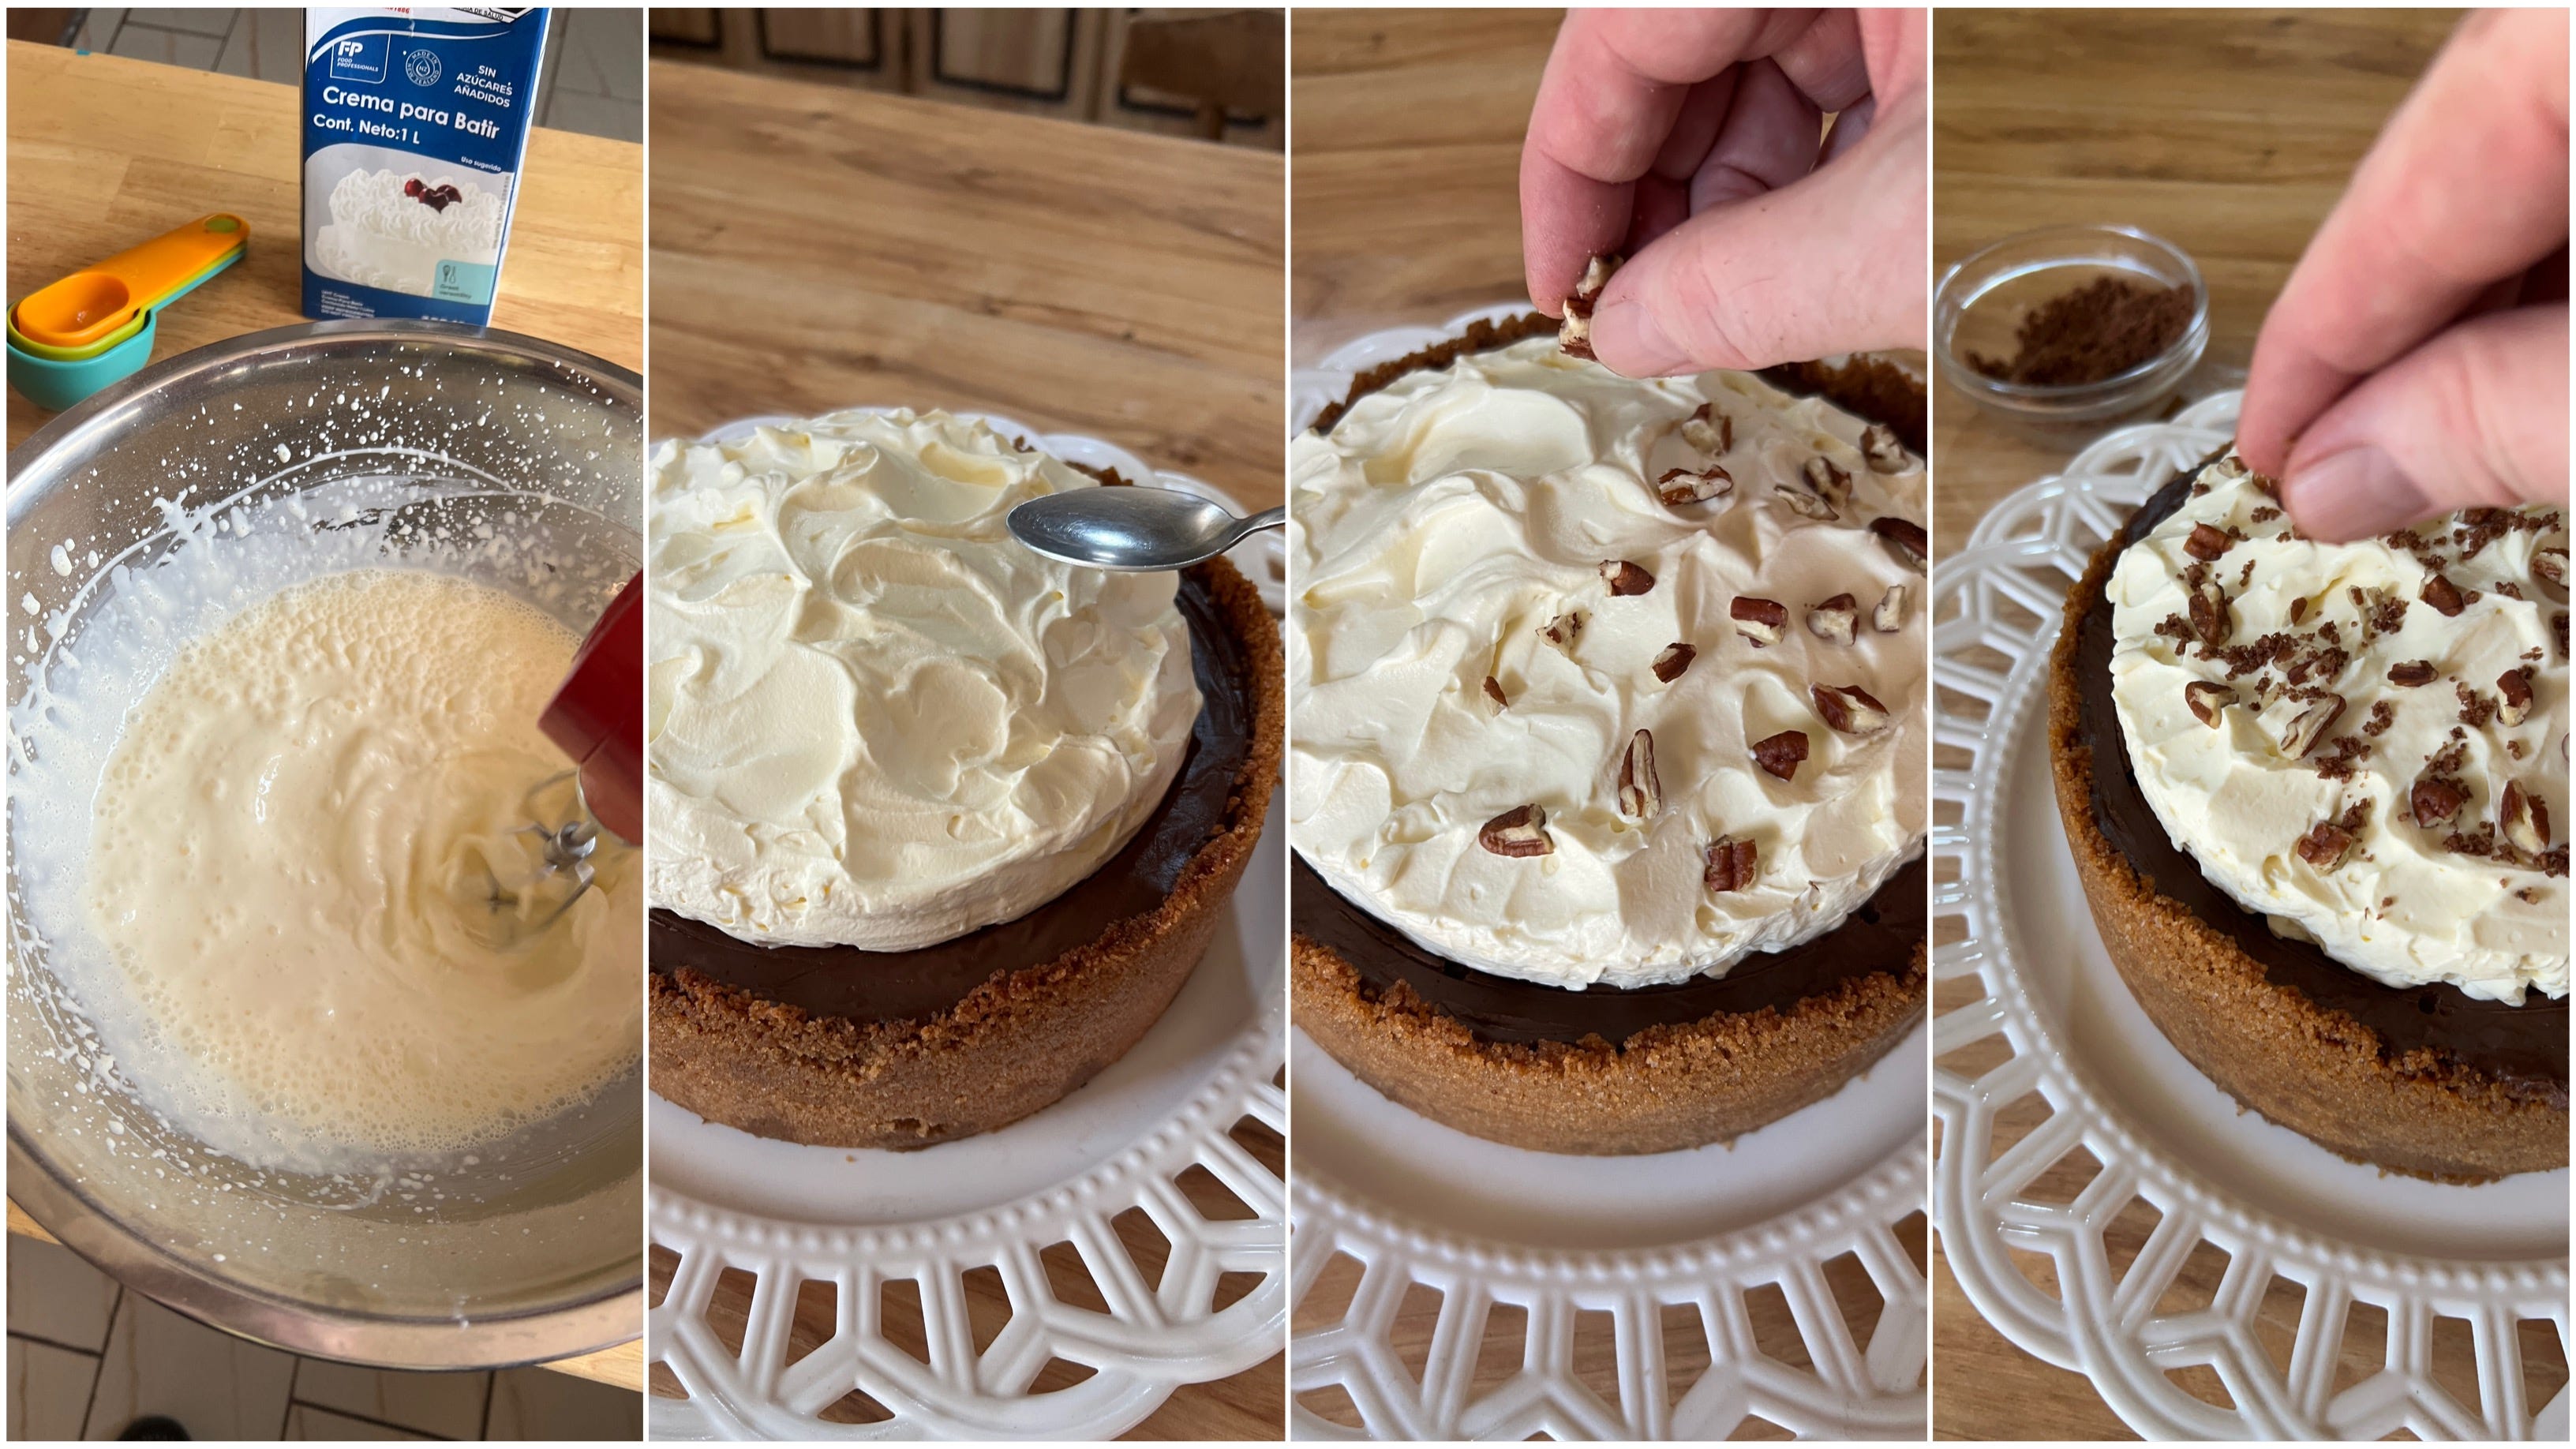
To make the topping: Before serving, remove the ring from the springform pan and transfer the cake to a serving plate.
Whip the all cream ingredients to soft peaks and spoon generously over the top of the cake, leaving about a 1-inch border to let that chocolaty goodness peek through! An 8- or 7-inch metal cake ring can be used if you want to have a precise circle.
Dust with cocoa powder, sprinkle chocolate crumble, chopped pecans, chocolate curls and drizzle with chocolate sauce to serve. All toppings are optional; pick and choose the ones you want… You do you!

Equipment (Disclosure: Items below include affiliate links with Amazon USA. You pay the regular price, and I get a small commission.) I only recommend products that I own myself and know to be excellent quality. I often get asked on social media sites about my kitchen tools, so here are most of them used to make this recipe.
Wooden cake pedestal (You can find many great kitchen goodies at this Virginia antique store.)
7” springform pan (This is a great pan for smaller cakes and cheesecakes. You can also use a 9-inch springform pan, but the pie will not be as tall.)
Mixing bowls (I like this oven-proof glass set of 10 for mixing and portioning out ingredients.)
Stand mixer (An electric hand mixer can also be used.)
Cordless electric hand mixer (This is a handy mixer for these smaller bakes.)
Kitchen scale (Ingredients should be weighed rather than relying on volume.)
Oven thermometer (All ovens need calibration, an in-oven thermometer is essential.)
Silicon oven mitts (I’ve burned my hands too many times with cloth mitts.)
Whisk (This is a standard for combining dry ingredients.)
Silicone spatula set (These are great for loading your piping bag with frosting and other tasks.)
Wire cooling rack (Every kitchen needs at least two.)
Amazingly rich, outrageously decadent.